DIY Frame TV
/Today i’m going to show you guys how I made my own frame tv! I’m obsessed with the frame TV, but I just couldn’t justify the cost. So I decided to make my own. I got a new TV, and chose the Samsung 55in QLED TV. It’s the same brand as the Frame TV and actually the same picture quality, so I think I can get the same effects as far as the “art mode” that the frame tv offers.
Samsung has “ambient mode” which lets you put a screensaver on the screen and you can adjust the brightness and colors to make it look like art on the wall just like the frame TV does. So really the only thing I don’t get is the Frame TV is thinner and has a box that allows you to be wire free. But I fixed that problem for myself by having a plug behind the TV.
So I bought this Samsung TV for half the price of the Frame TV and my DIY frame only cost me $40! (I only had to buy wood, I had nails, glue, and stain already).
Materials
2 - 1x3x8 Pine Board (I got a little nicer wood than common board)
2 - trim pieces (optional)
Stain
Brad nails
Wood glue
Nail filler
Tools
Nail gun (optional for more stability)
Drill ( if you need to make a hole for the TV sensor)
TV
Samsun 55in QLED (Samsungs have ambient mode if you want to achieve artwork mode)
Measure out your TV
I measure out the sides of my TV to cut the wood for the frame. I mitered the edges of my wood at a 45 degree angle, so you want to make sure you measure accurately. I measured edge to edge on the TV, and then used those measurements to measure from the inner point of each angle.

2. Cut
Next I cut my pieces. I used a miter saw since you can turn the saw to a 45 degree angle and makes precise cuts so you know your pieces will fit together seamlessly. Make sure you cut on the short side of the wood at a 45 degree angle. This is the edge that will be the “frame” around the tv.

3. Secure pieces together
I used corner clamps and wood glue to hold the pieces together and let dry overnight. If your glue doesn’t seem to be holding strong enough, you can also use a brad nailer to add more stability and nail the corners together.

4. Account for Sensors
If your TV has a sensor you may have to notch out a piece of your frame so it fits around the sensor.

4. Optional - Add trim on top
You can leave your TV frame as is, but I wanted to take mine a bit further and cover up the edges of the TV, so all you see is the art on the TV. I picked up a couple pieces of trim, and repeated the steps above, but this time I’m putting the trim on top of my existing frame. I used my brad nailers to attach this to frame. I used some nail filler to fill the holes, sanded, and then stained it!

DONE!
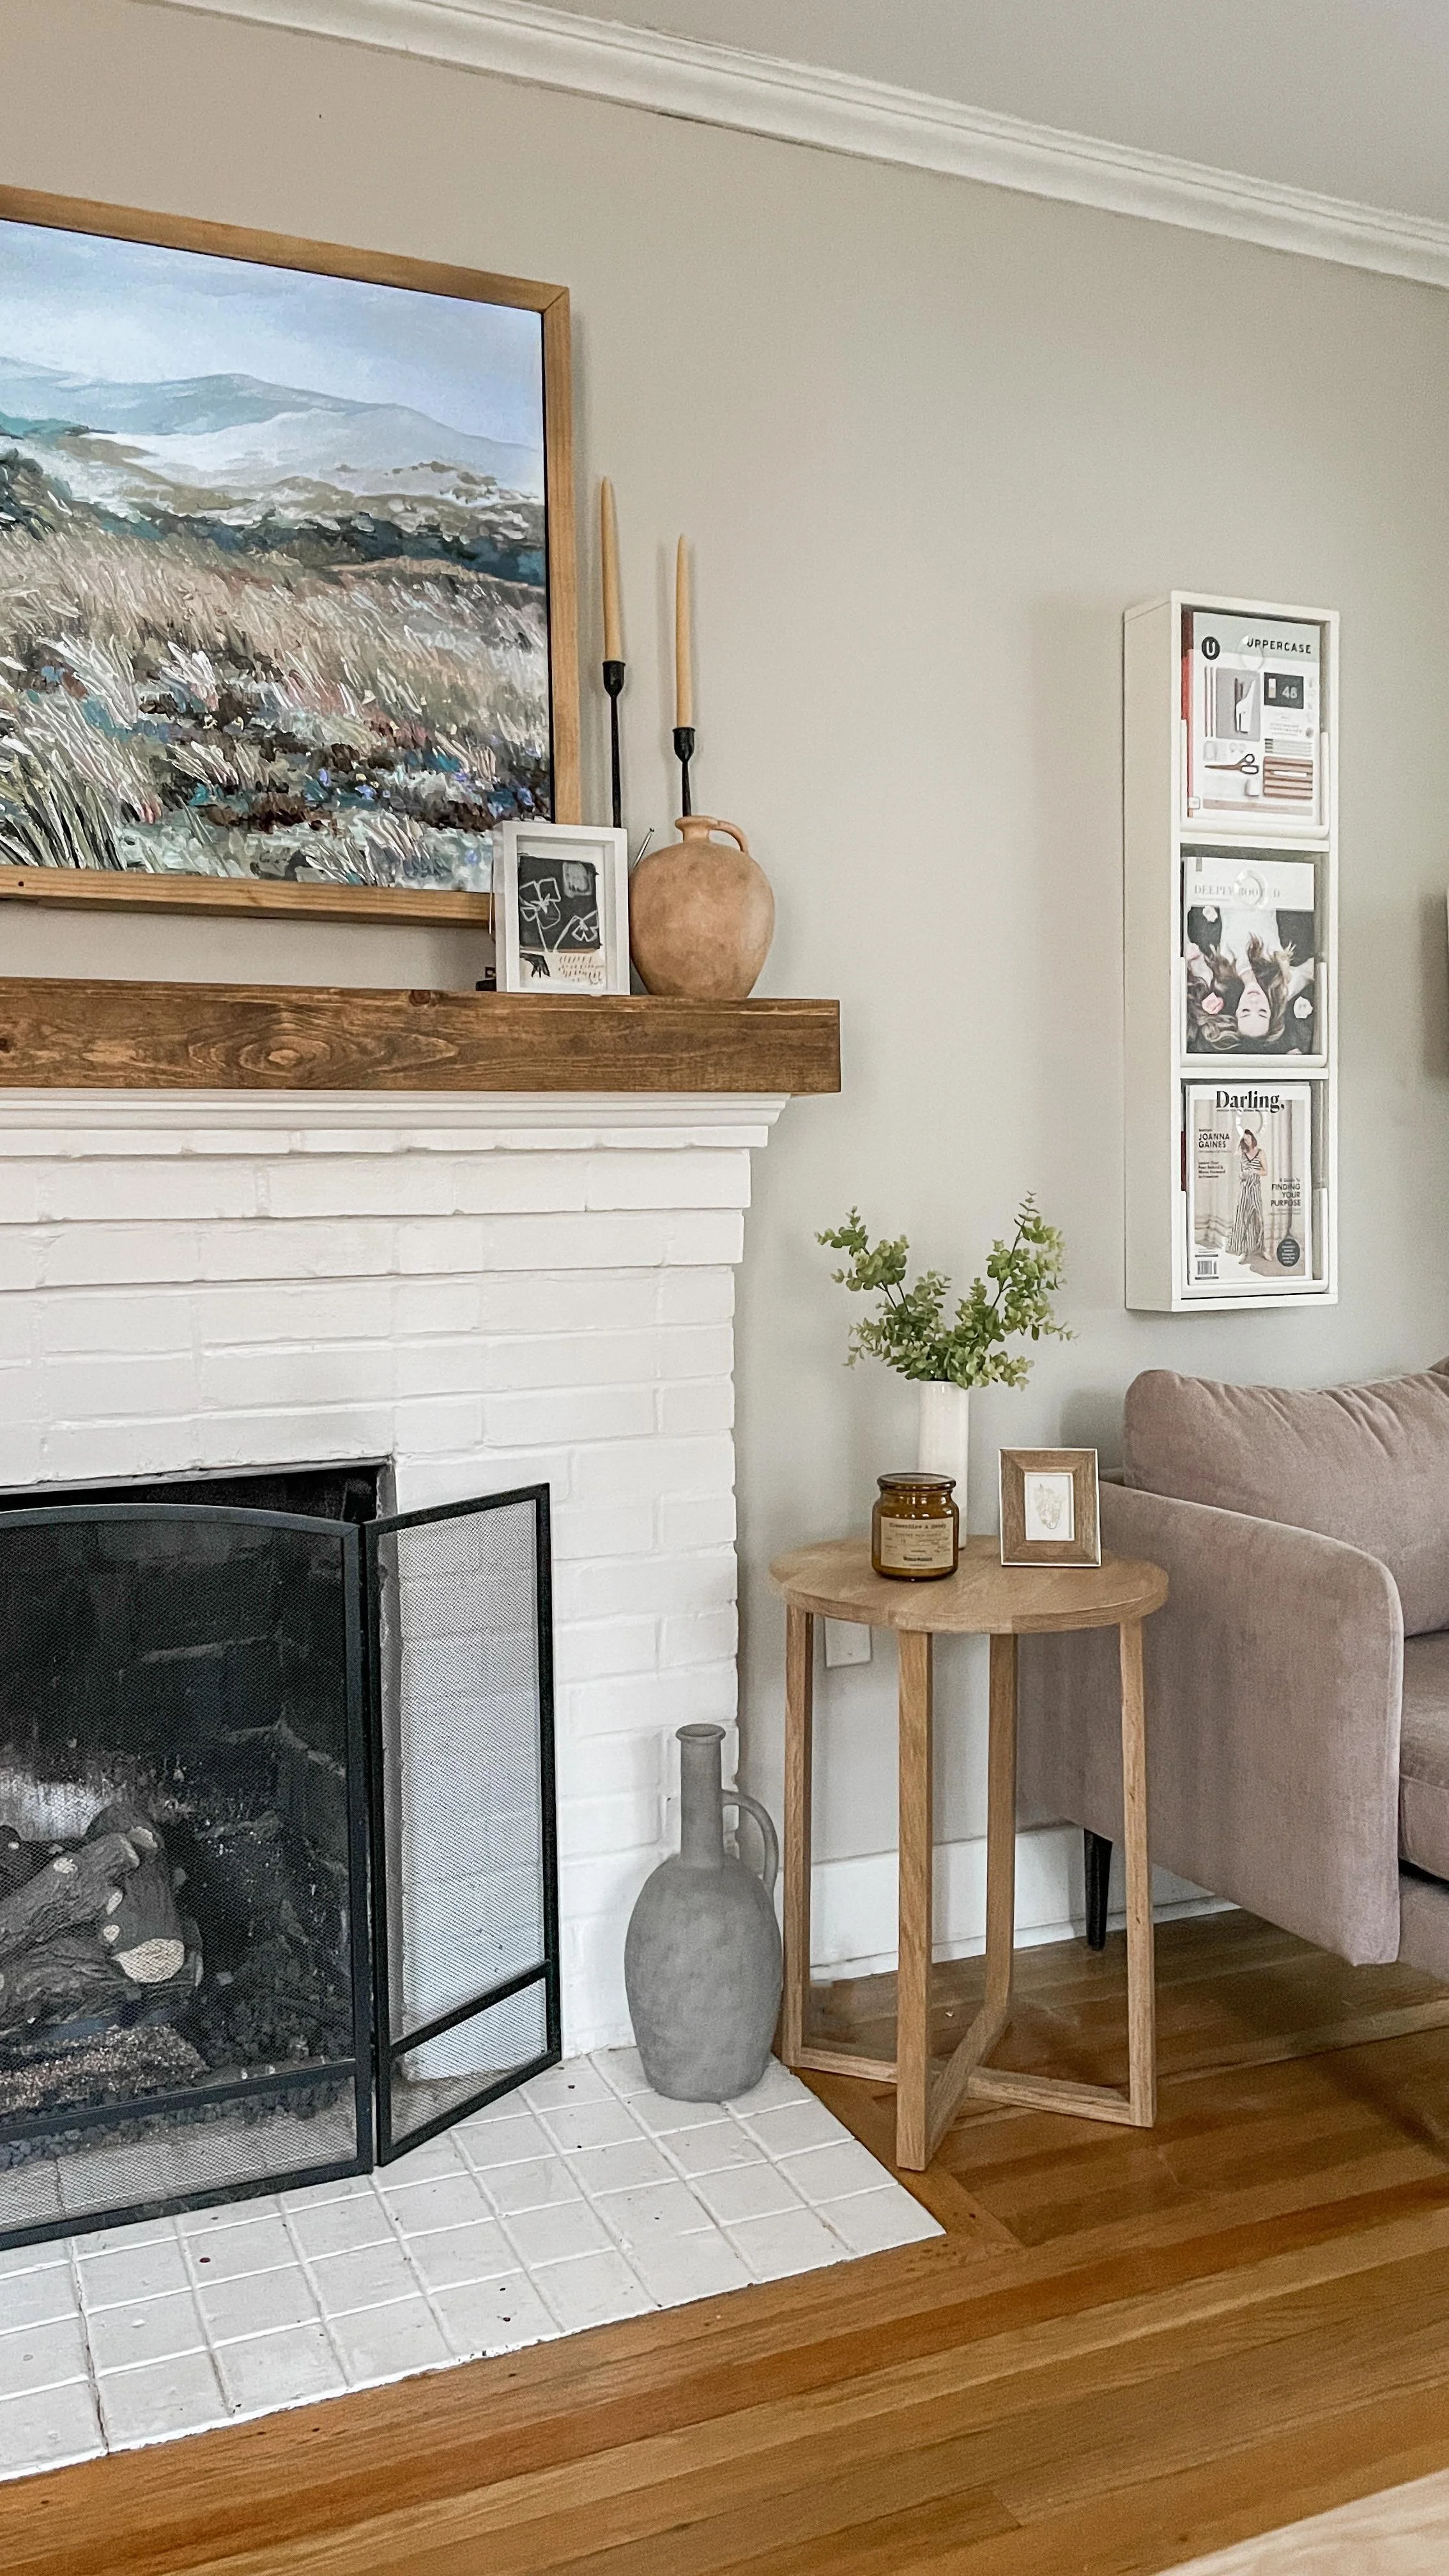
And here’s the finished product! I love it, and think it achieves the same look as the Frame TV, but much cheaper! Some notes: make sure to take notes of your vents. I drilled a couple holes in the bottom to allow the vents to breathe still since that’s where they are located. I ddI the same for the sensor and drilled a hole so my remote still could communicate with the TV.