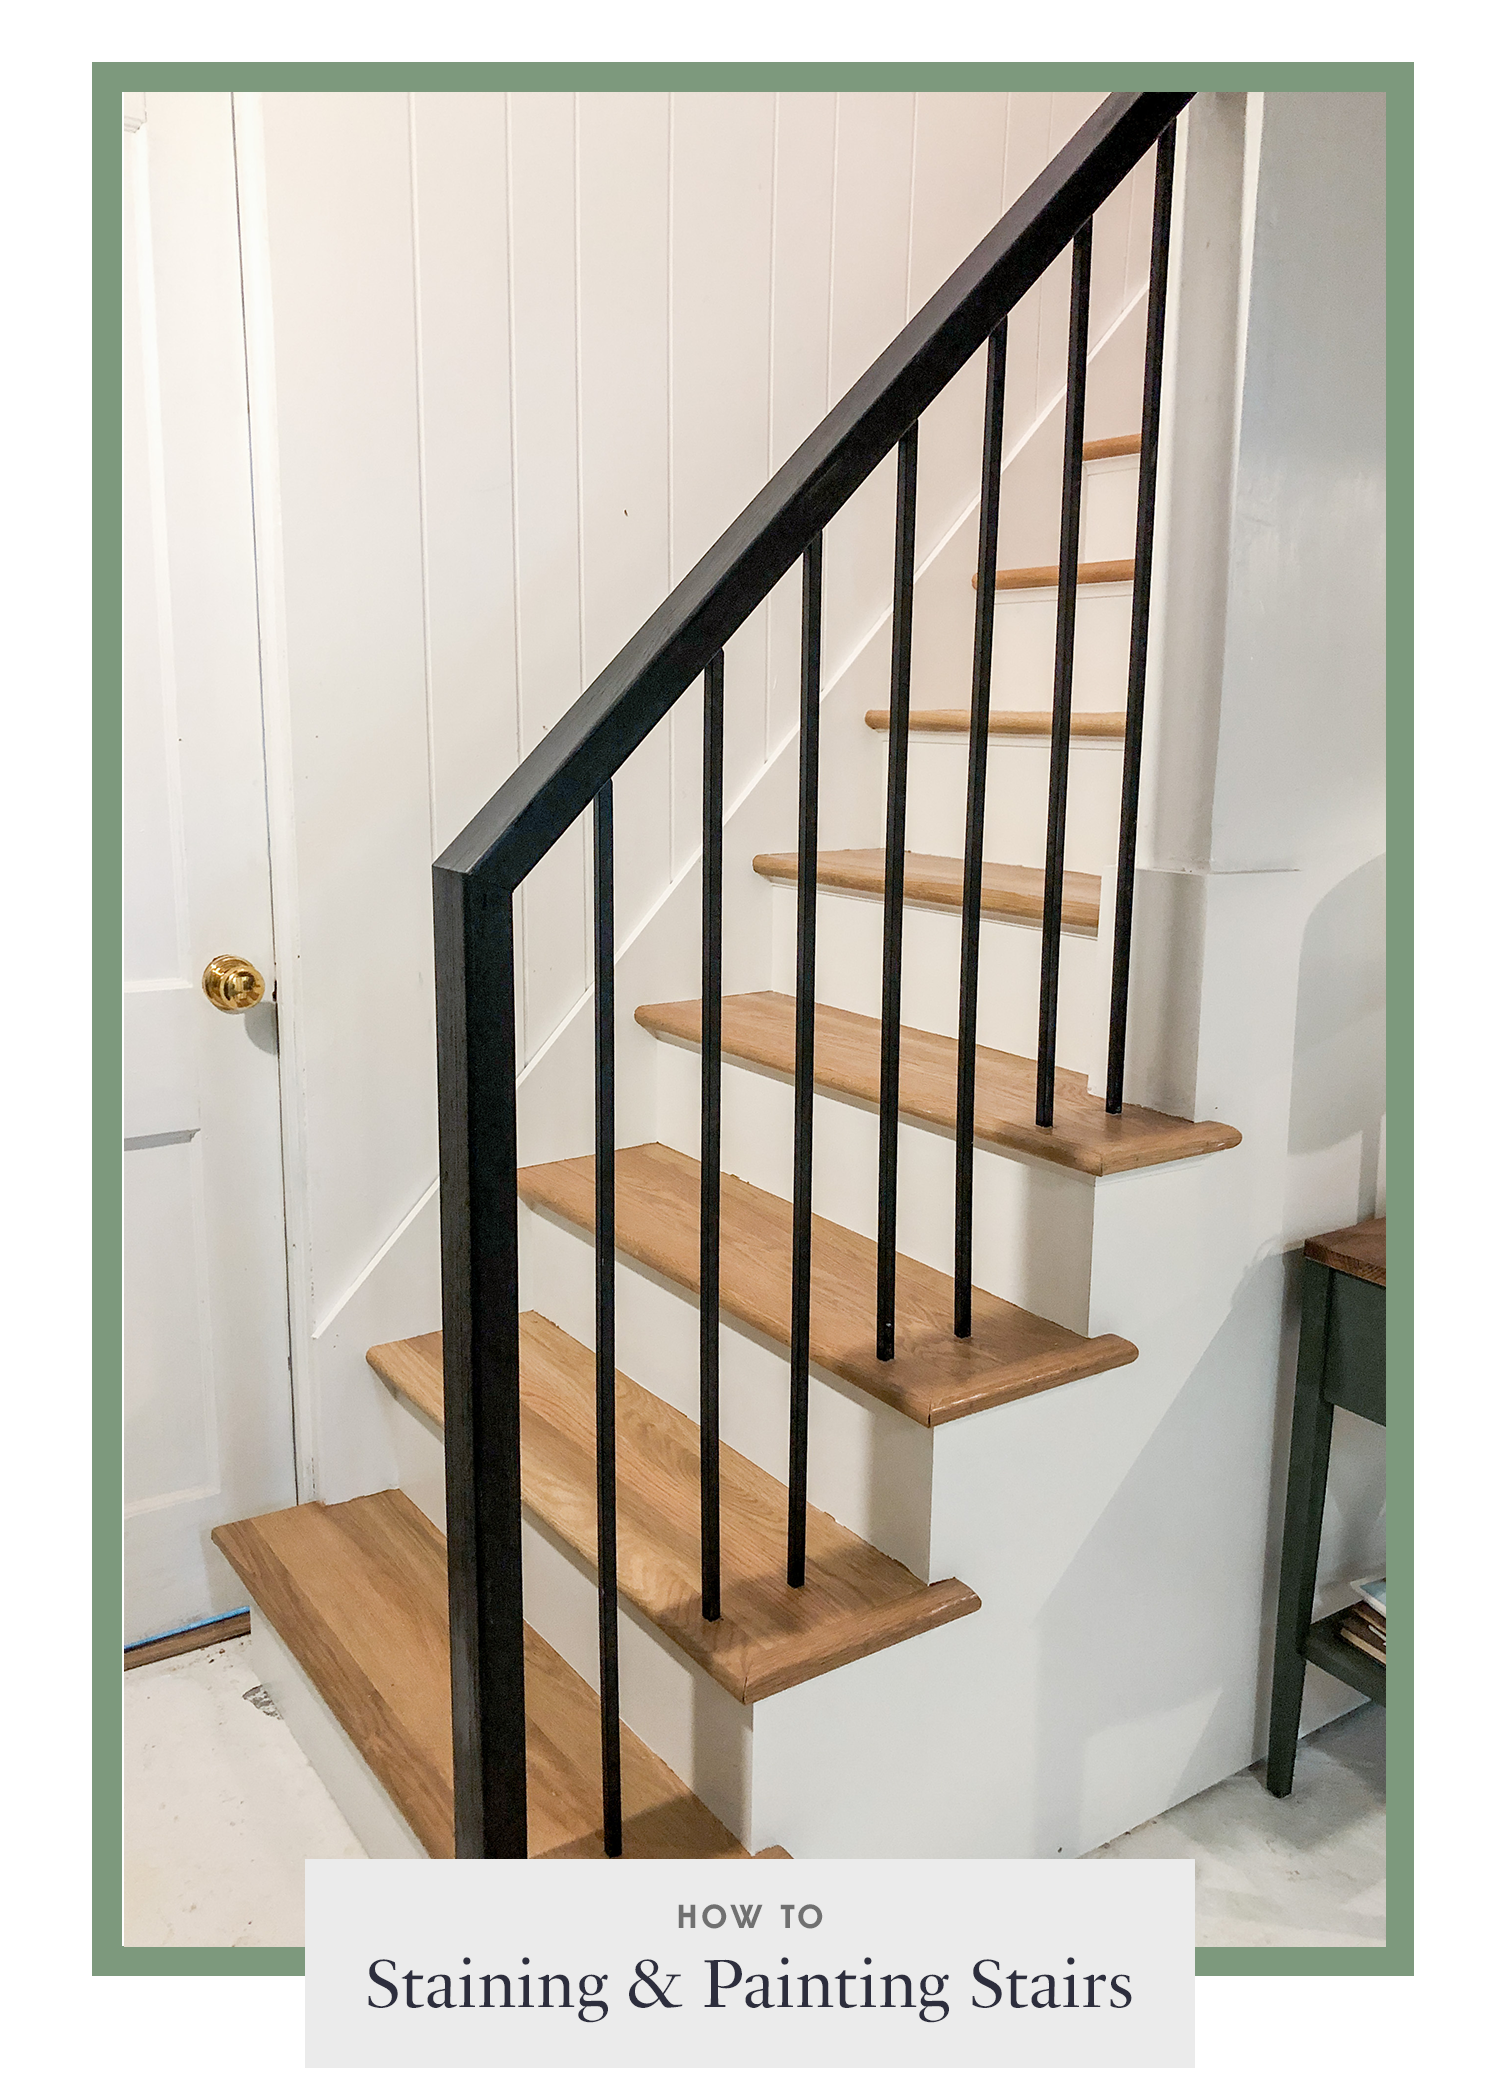
All the details on my new staircase! PLUS how to stain/paint stairs
/Hi friends! Today’s blog post is all about my brand new staircase! I’m breaking it all down for you guys including the paint sources as well as the process and how it went for the actual stairs getting built.
Supplies
If you are wanting to do the painting and staining yourself, here are the supplies you need
Miniwax Stainable Wood Filler
Miniwax Stain (I used weathered Oak and Driftwood)
Clear Satin Polyurethane
220 Grit Sandpaper
Clean clothes or old tshirt
Behr Snowy Pine in Satin
Angled high quality paint brush (the better the quality the better the coverage)
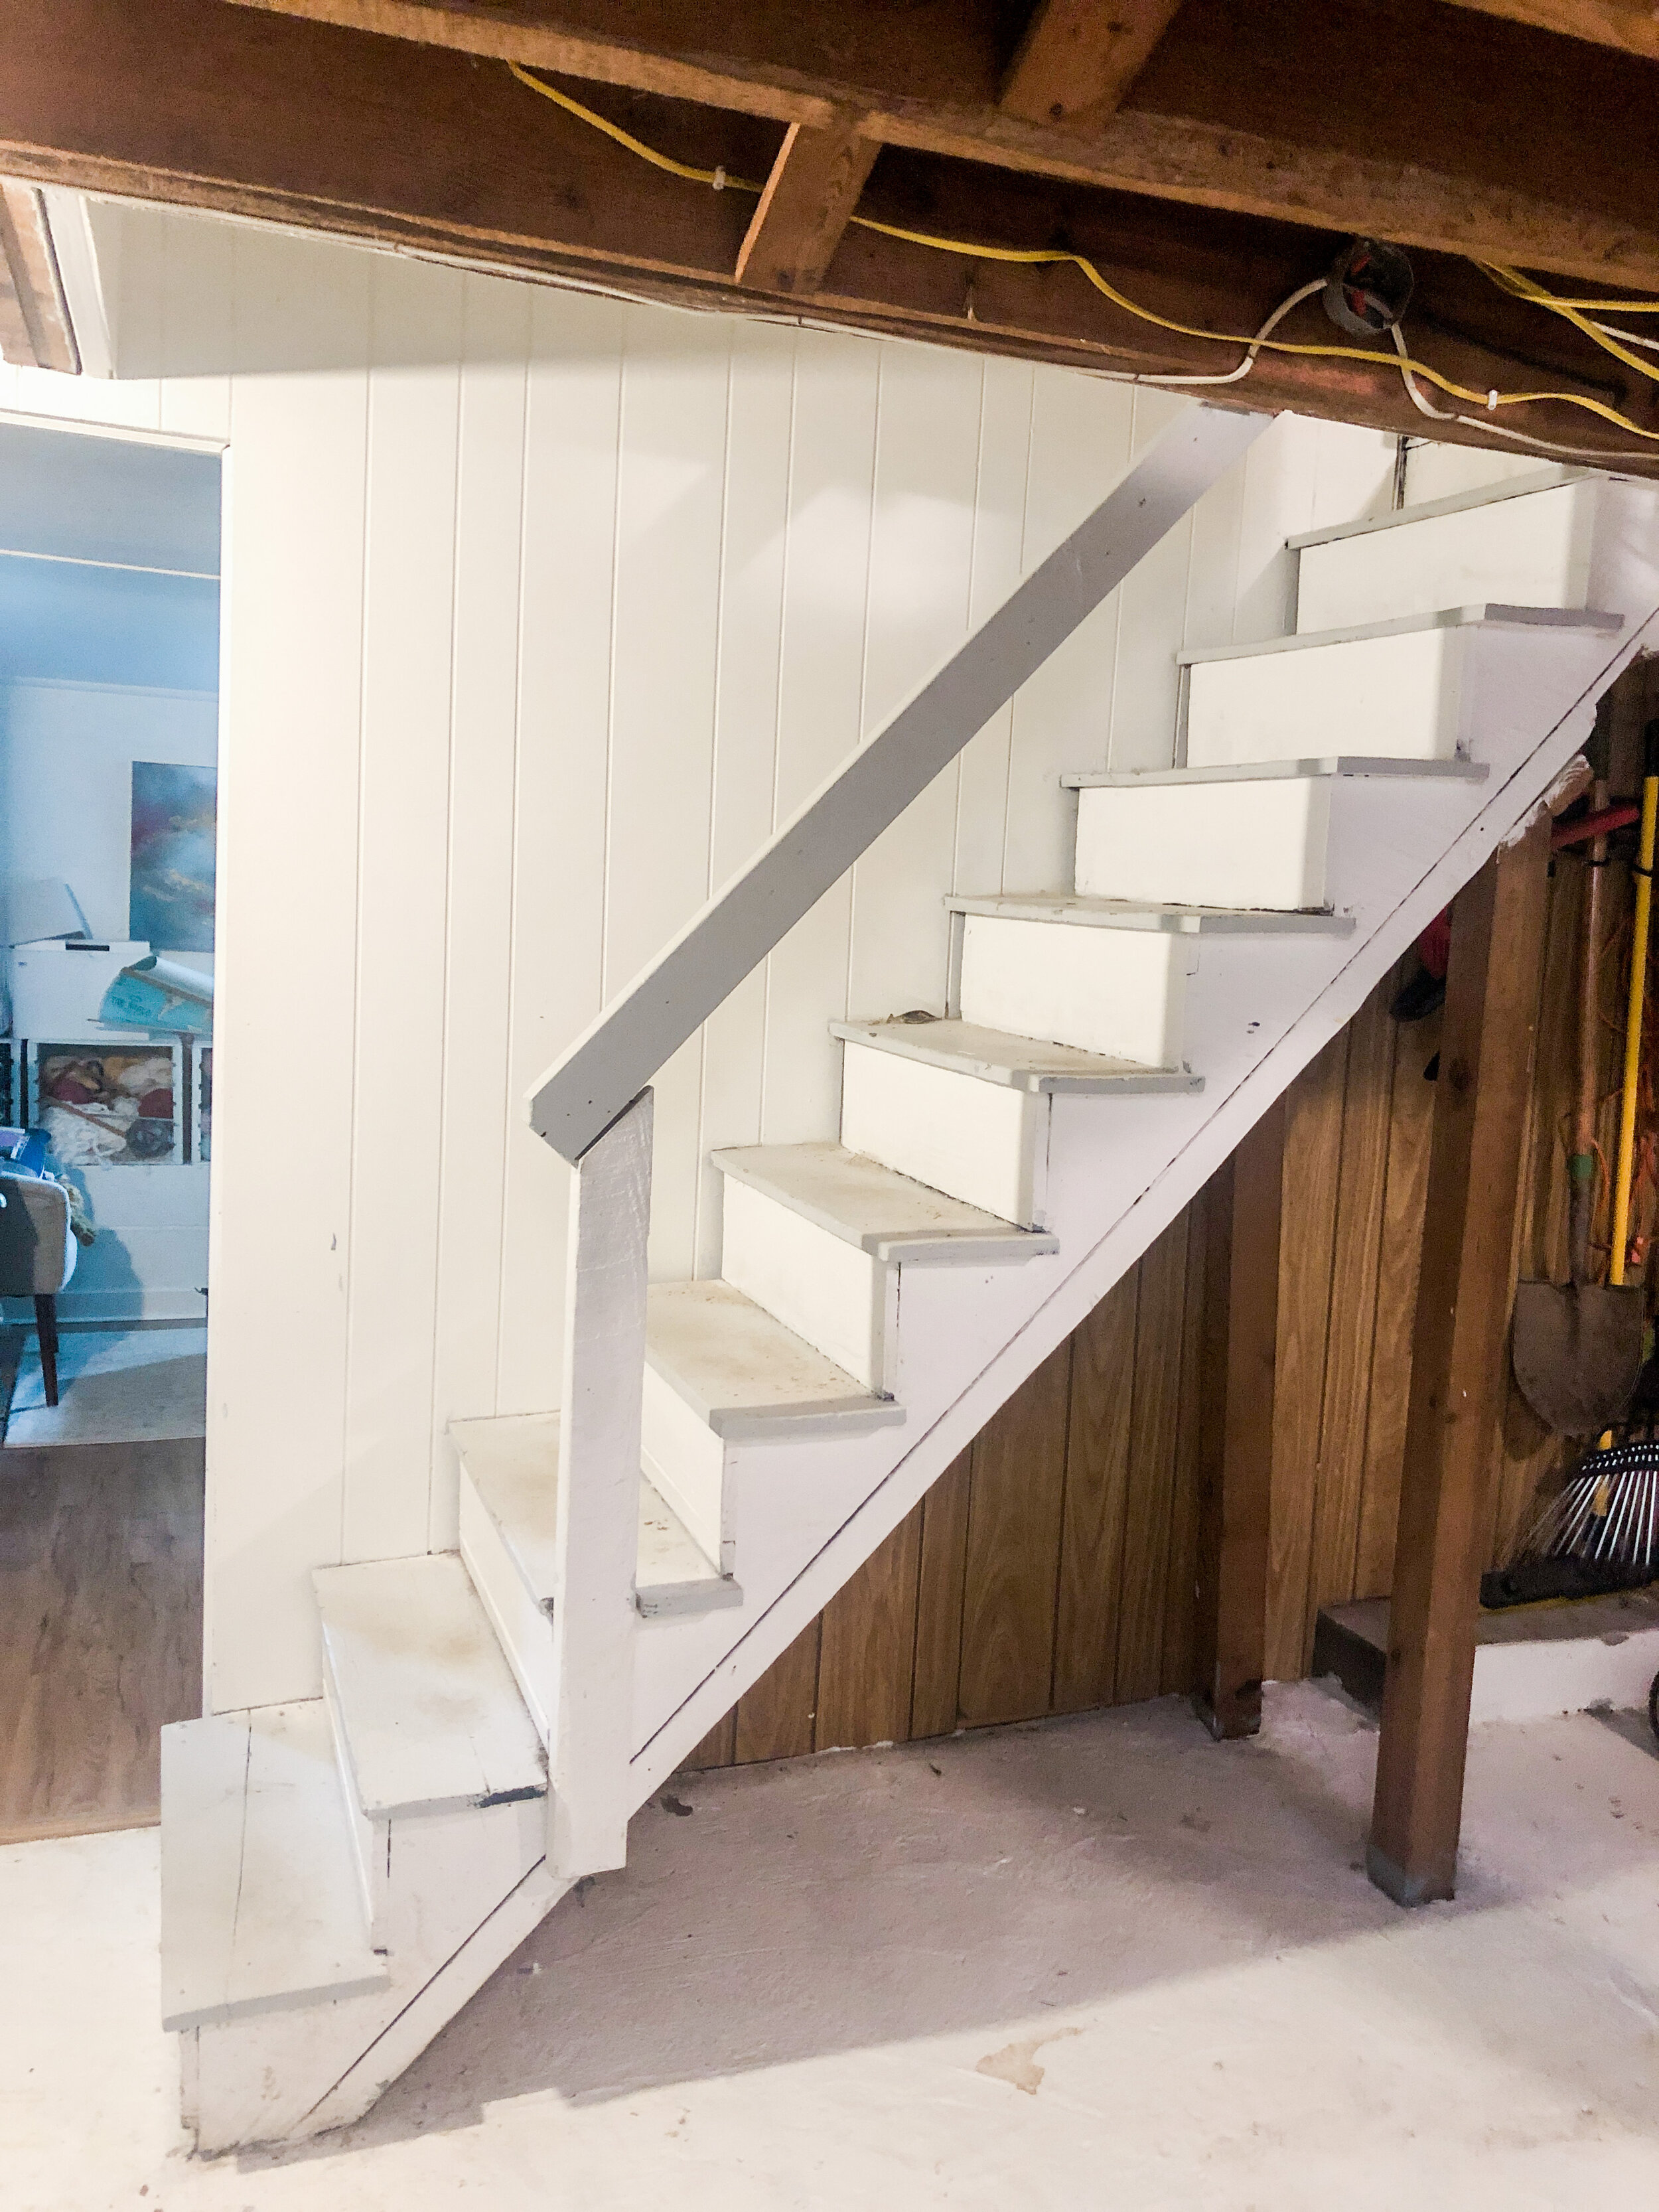
Where we started
Let’s start with what I had before. When I first moved in, I quickly gave the treads a new coat of paint and painted the paneling to brighten it up in the hallway. I also got the hallway of the staircase renovated which you can read about here. Even after I made all those improvements, it still didn’t feel right. The stairs were very squeaky and old, not uniform, and I painted them a few times and they immediately got dirty again. So I knew I needed to get them replaced eventually, and especially if I wanted to integrate my basement more so.
I had a few people give me estimates, but ultimately went with Vine Woodworks. They quoted me $2,500 to basically build the stairs from nothing. None of my stairs were usable, so this included reframing, and even framing in a closet behind the stairs. They do staircases for a living and I felt more comfortable spending a little more money to get really nice professional stairs rather than getting a more DIY type person. They came out to look at them and just seemed to know what needed to be done to upgrade, so I trusted that they knew what they were doing. I provided them with pictures of what I wanted it to look like as well.
Here is what I showed them below as inspiration. I went with a wood railing though to save money, but still wanted to get the same lines and look.

inspiration picture
Installing the stairs
They installed the stairs in just one day, so if you are apprehensive because you think you might not have access to upstairs or downstairs, they did mine super fast, and mine included having to completely reframe and build the stairs from nothing. We did have some communication issues, but I have kind of accepted that all contractors just don’t think like I do and are not Type A people lol.

Finishing the stairs
I decided to tackle finishing the stairs myself. I was quoted $800 to paint and stain and I was already paying a lot for the stairs itself, so I wanted to save money by doing it myself. I documented my process for staining the treads if you want to check that out on my instagram, but I used Weathered Oak and put Driftwood immediately on top. If you are looking to also paint and stain your stairs you can follow these steps:
I first had to fill in all the nail holes in the treads. Make sure to use Stainable Wood Filler. Miniwax is best. I made the mistake of using a different brand that claimed to be stainable and it was not!
Start my staining all the treads. You can be messy if you plan to paint the risers or the sides white. I would also test your stains on a scrap of the treads the workers can leave you. Stain looks different on every type of wood, so you want to make sure it looks exactly how you want.
Let the stain dry for 24 hours. Once dry, make sure the treads are wiped clean, and you will begin coating the polyurethane. I used a foam brush and you’ll want to do a thin layer. Make sure there are no bubbles and it goes on smooth. If you are in a dark area, use a flash light so you can see where you are putting the polyurethane since it is clear. I would also make sure you get clear, so that it doesn’t change the color of your stain.
You can re-coat your polyurethane every 4 hours. It’s important to make sure it is dry though. If it’s slightly sticky that is fine though. Be sure to use only 220 grit sandpaper to sand in between layering on the polyurethane. This helps smooth it out if there’s any uneven spots and makes it less sticky as you put more layers on.
Once you get to the third layer, this will be the last. DO NOT sand it after the last coat. I let my last coat dry for 48 hours before I stepped foot on it. If you use your stairs too early you will be able to see where you stepped, so just be safe and let it dry.
After everything is try, I used some frog tape to tape up all the treads, so I didn’t get paint on them. This tape is supposed to be better and not let any paint bleed through the tape, and you do not want to skimp here because you can’t save any paint that gets on the treads.
It’s time to paint everything! I painted the risers and the sides all white, and I did 2 coats for everything. Let fully dry overnight and you can remove the tape the next day! My tape did pull up a little paint, but it was minor enough that I could touch up safely!
And they’re done! We did have to install some drywall, but I don’t think most of y’all will have that step! I’m so happy with how they turned out and very similar to my inspiration picture! The only thing I don’t love is my stain color. It’s not bad though, so I’m just going to be happy with it!