How to Make DIY Bifold Doors
/
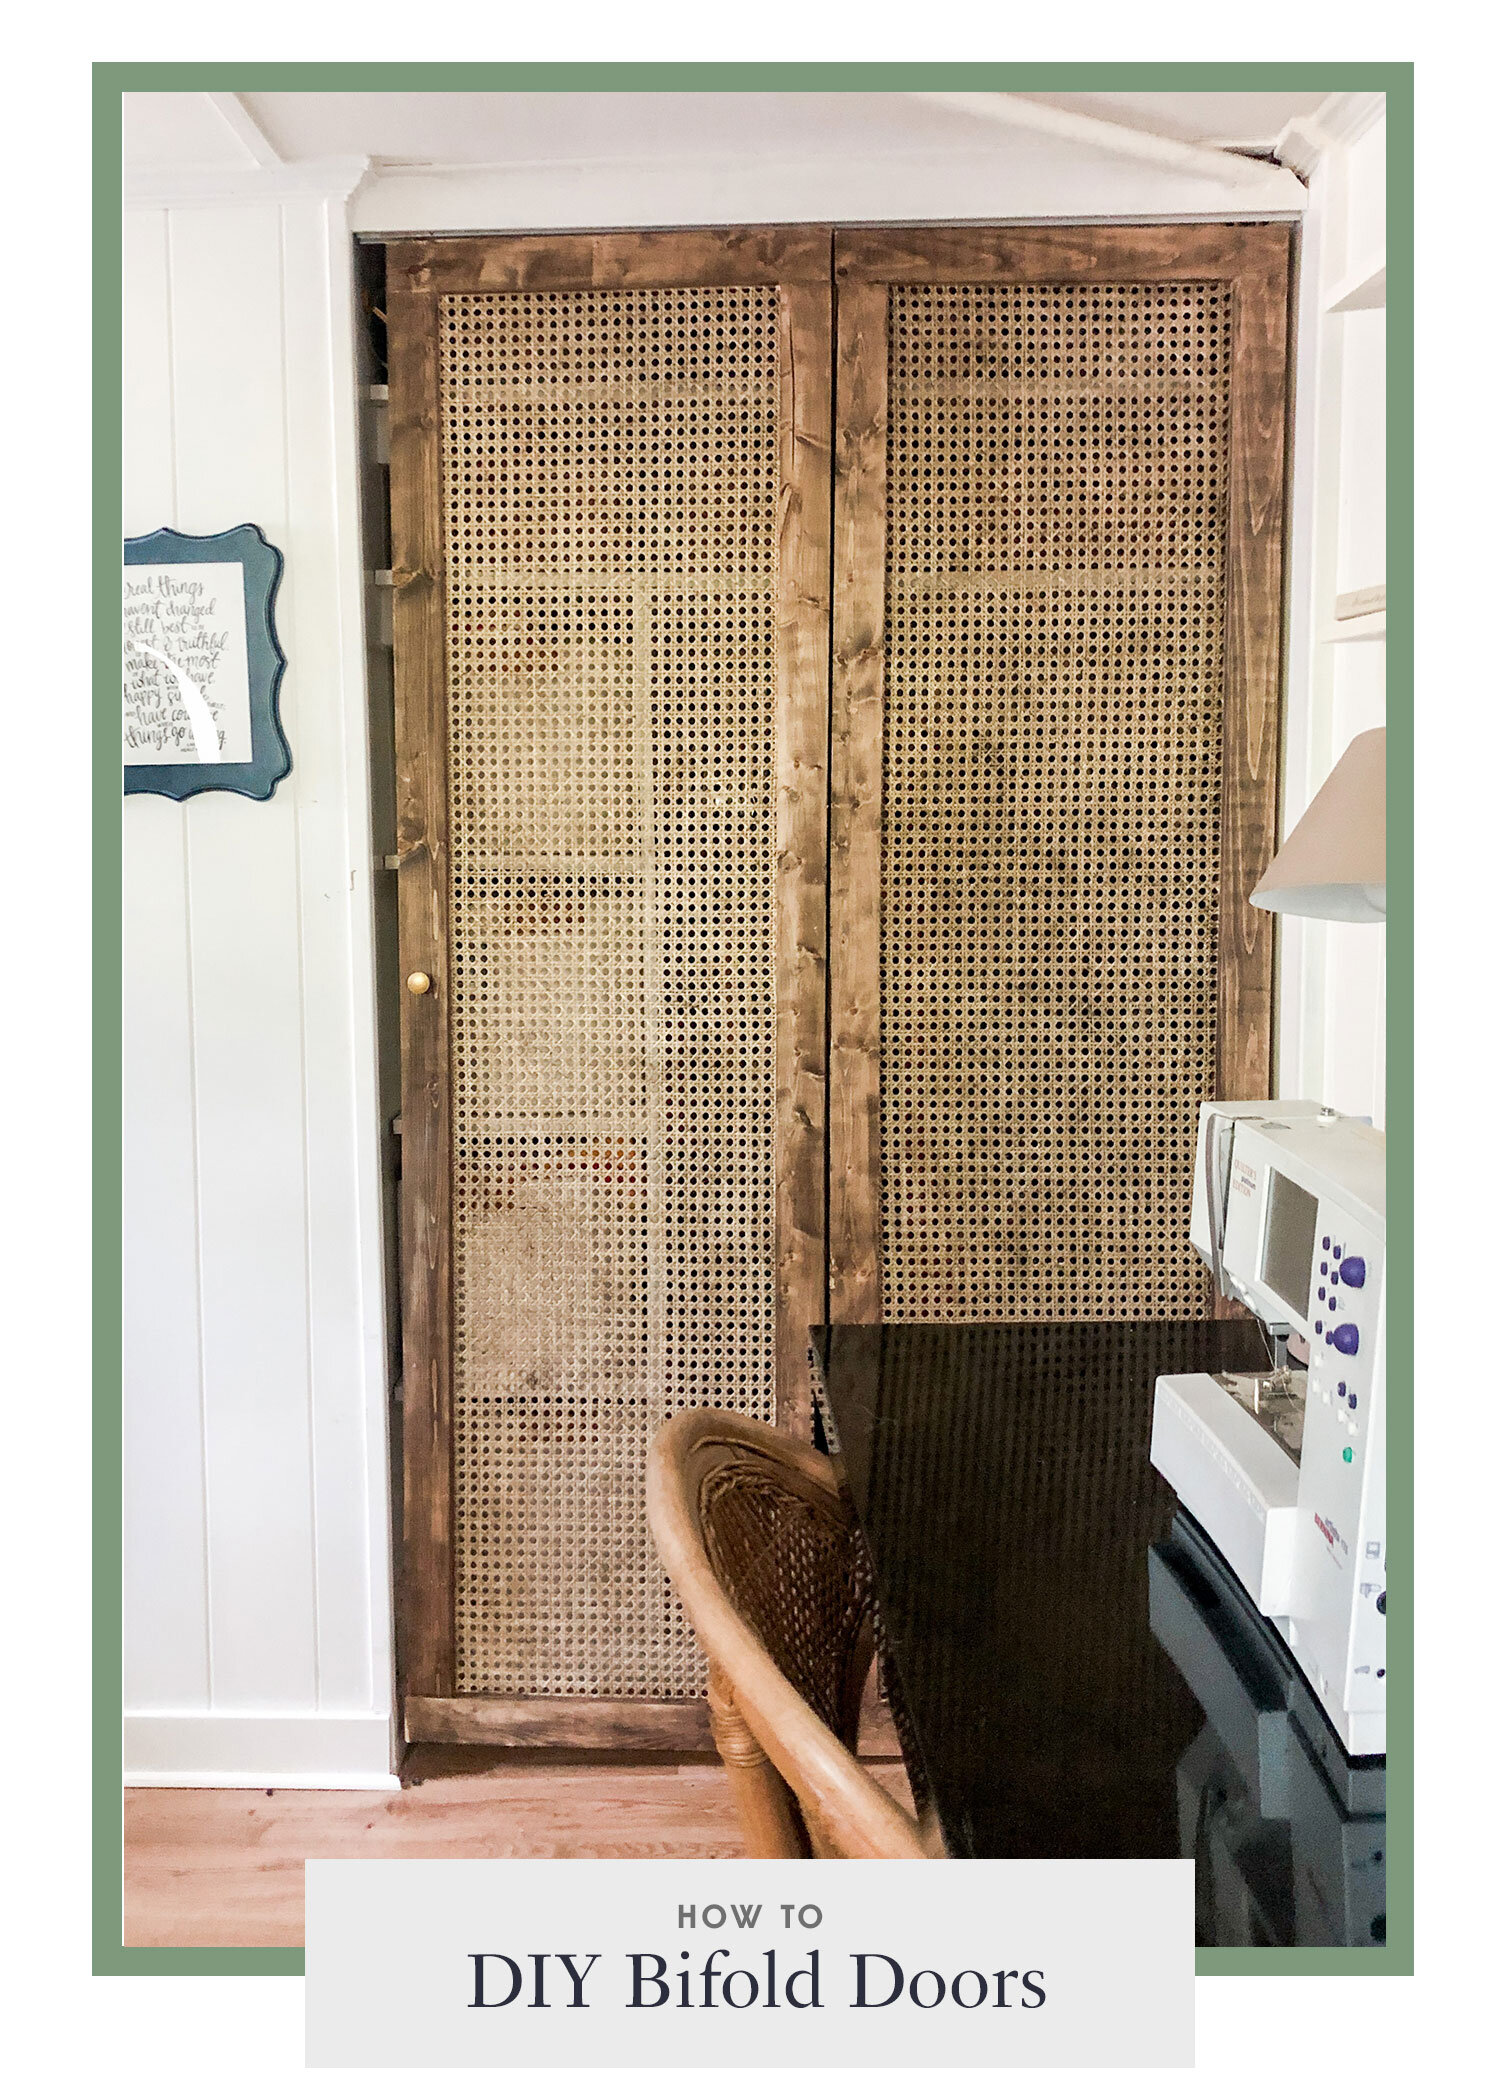
This week we’re talking about how to make bifold doors! Specifically bifold doors with cane in the middle! Feel free to customize with a different material, but I’m going to show you guys how I did it!
Materials
5 1x3x8 Common or Pine Boards (depending on quality you want. Make sure you buy really straight and flat pieces!)
1 ¼ inch Kreg Jig Screws
Stain of your choice
Tools
Measure everything
The first thing you’ll want to do measure the size of your door opening. You’re going to measure the opening of the area, subtract 1 in from length to give you the height of your panels. Then you’ll measure the width of the open and subtract a ¼ per panel. So if you have 2 panels you’ll subtract ½ inch from the total width. And since you have 2 panels divide that by 2 to get the width of each panel. If you have trim, make sure you are accounting for that in terms of the width.

Cut to size
Once you have all your measurements it’s time to cut. You’re going to start by cutting the first layer for each panel. Do not cut both layers at the same time. Cut and assemble the bottom layers for all your panels and the remeasure and cut the top layer based on the assembled bottom layer to ensure perfect fit. Each one will have two layers of wood that you’ll put the cane in between. You can see how I cut the wood with the image below. Using a Kreg Jig, we’re going to make pocket holes to attach each piece together, which you can also see on the image. Use the Kreg Jig 1 ¼ screws to attach each piece of wood together.

The illustration shows how to assemble the top and bottom layers as well as where to drill your pocket holes

2nd Layer
Once you’ve cut and screwed together all the pieces for the first layer, go ahead and cut the 2nd layer based on the measurements of the first. Sometimes your measurements can be ⅛ off, so it’s best to get the most precise measurements. Repeat with the pocket holes as illustrated for the top layer. At this point you can go ahead and sand and stain the pieces if you would rather stain before attaching cane.
Attach the cane
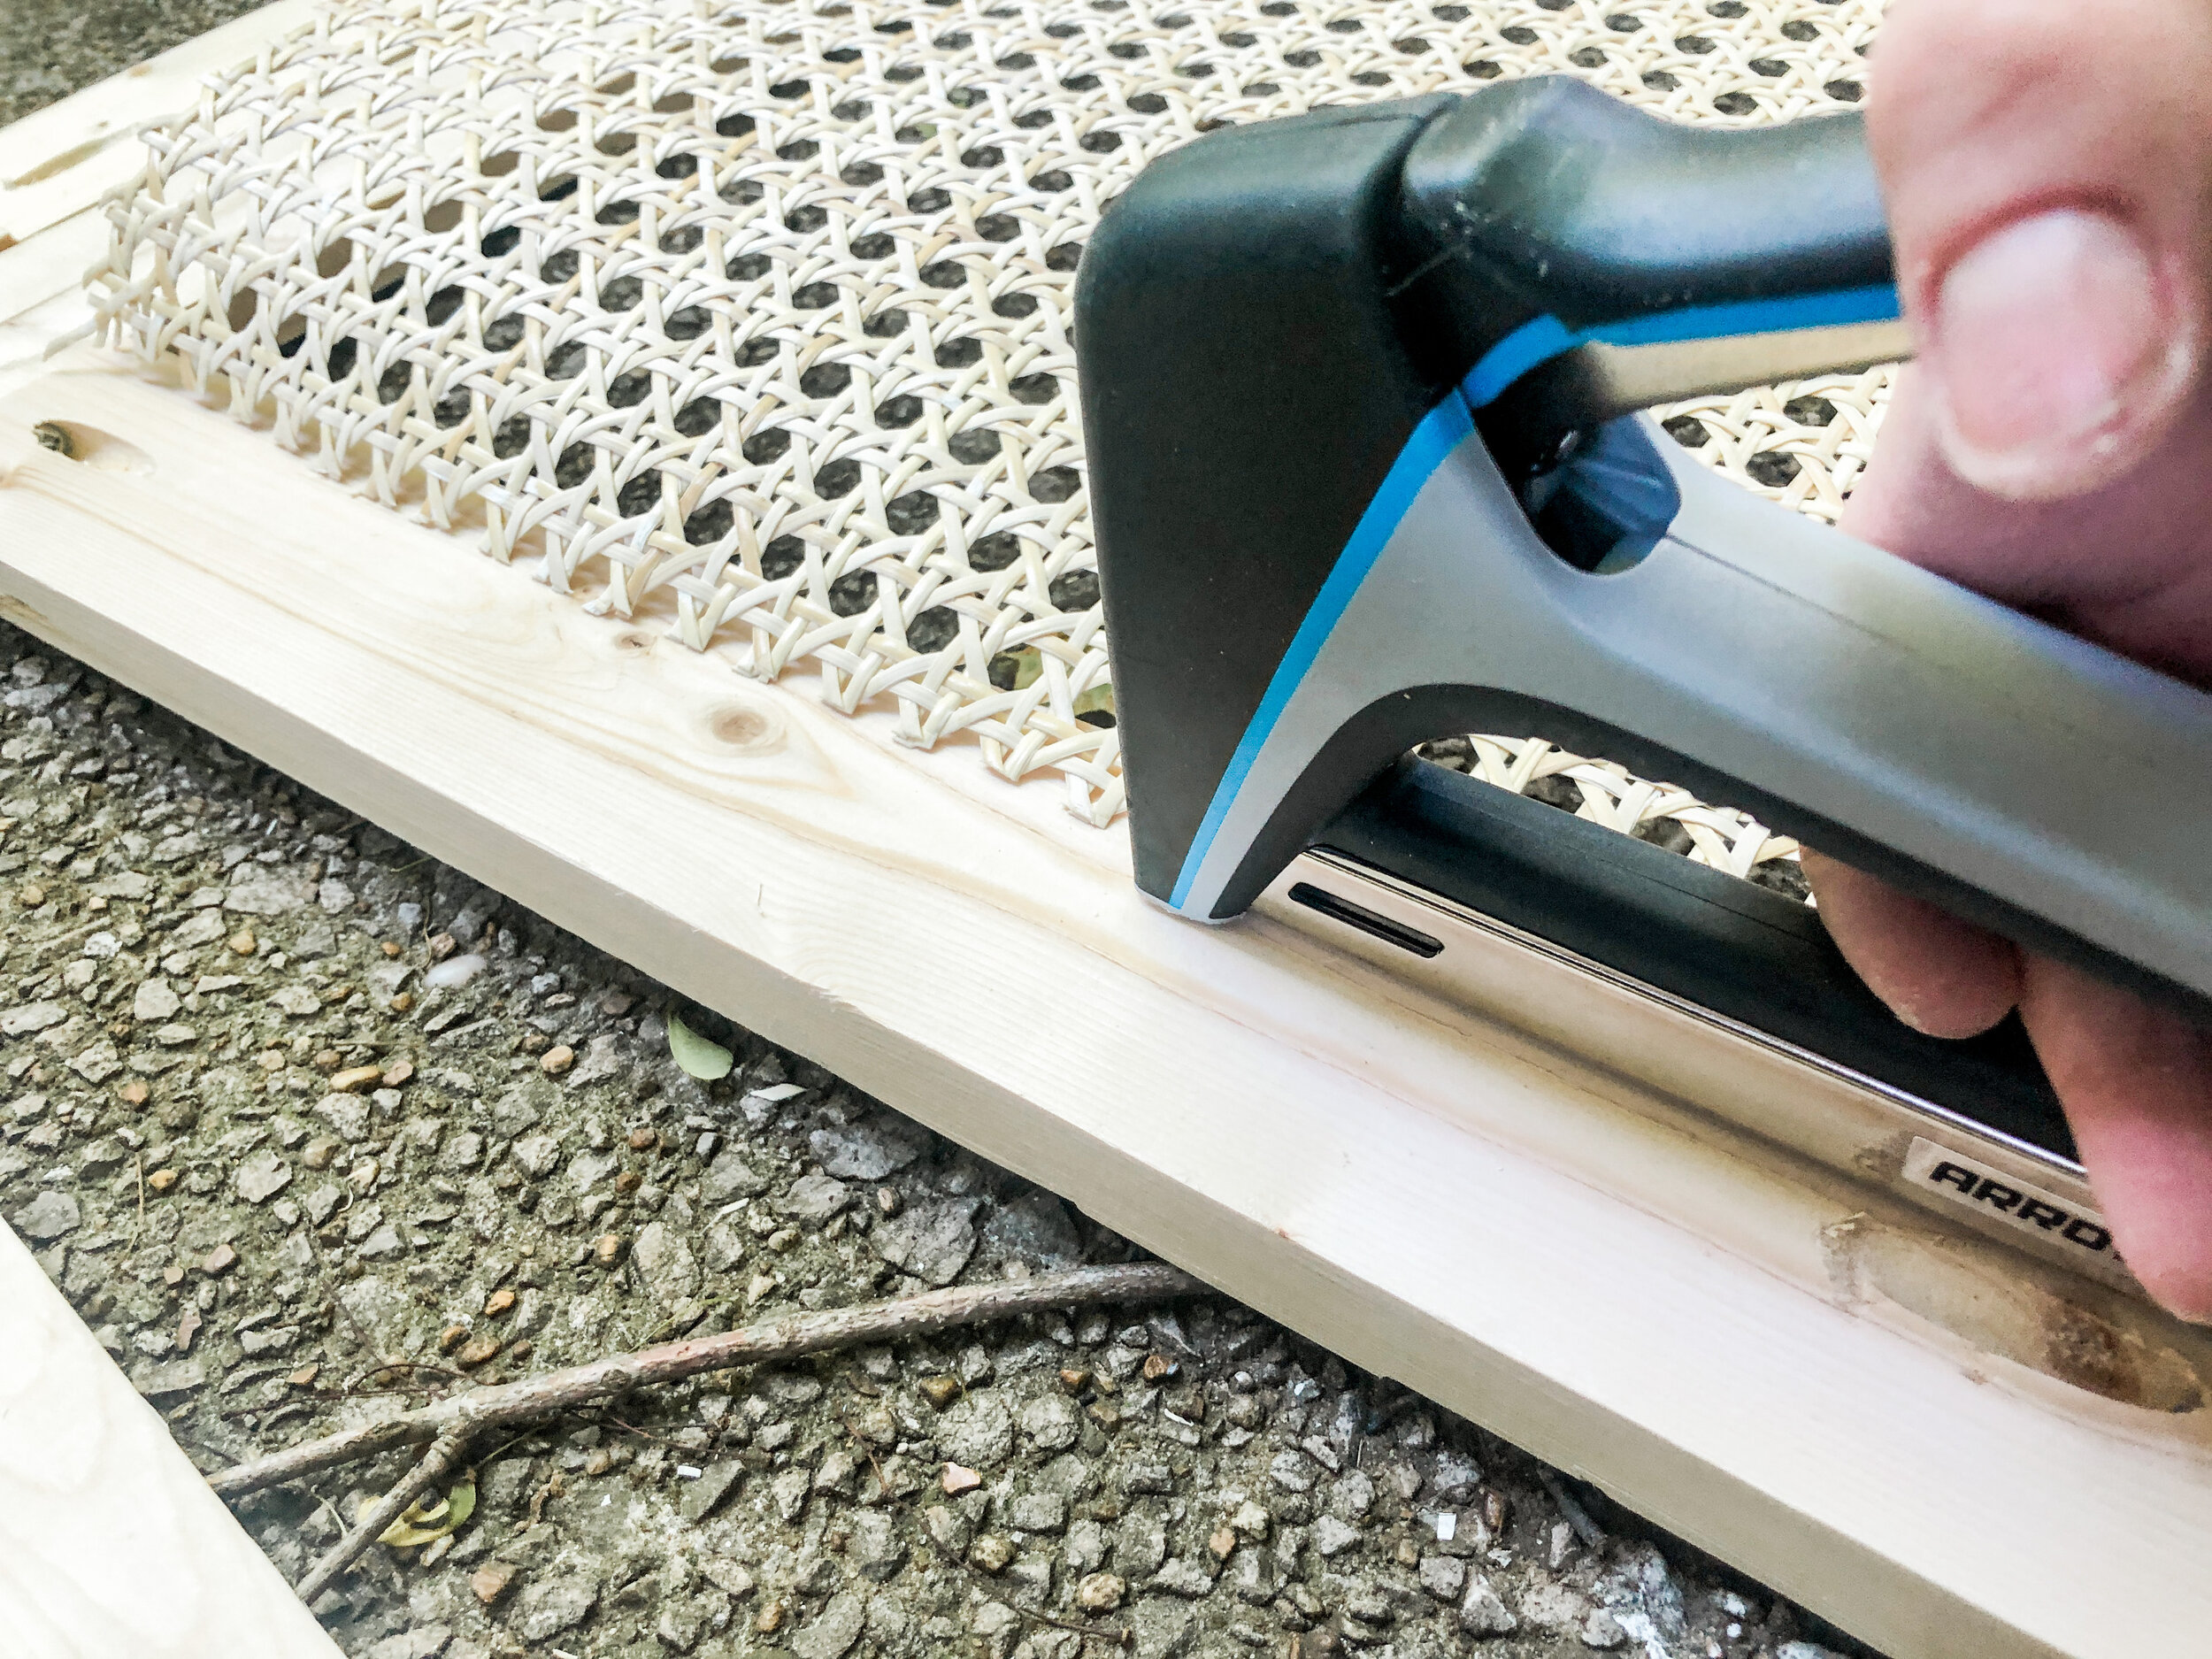
Next, we’re going to attach the cane webbing to the bottom layer using a staple gun. First cut the cane to size of the panel leaving some over the edge to allow for staples. The most important thing you need to do with the cane is to soak it. If you skip this step your cane will be warped. By soaking it you can stretch for a tight fit and it shrinks when it’s dry to be really tight. Soak each piece for 30 minutes. Next go ahead and staple each piece to the bottom layers. Allow it to dry.
Glue on top layer
once the cane is dry you can go ahead and glue on the top layer. I used liquid nails as it is stronger than wood glue. Make sure to apply glue evenly for a tight fit of the panels. You’ll need to clamp all the way around to get them as tight as possible. You can also use heavy books if you don’t have clamps. Let dry overnight.

Sand, Sand, and Finish
Once everything is dry, sand your heart out until you are satisfied with everything being smooth and flush together. Now you can either stain all the wood at the beginning before you put the cane on or now. If you don’t want to stain the cane I would suggest staining before attaching the cane. Stain whatever color you like, let dry, and then seal the wood with your preference of sealer.
Install bifold door hardware
Refer or hardware instructions on how to install. Since we have two layers of wood, I tried to put it as close to the middle while still staying in one layer of wood. You’ll have to adjust it to fit your door frame, but just follow the instructions and it’s easy to install. The hardest part is lining it up with your door frame, especially if it isn’t square. And you’re done! Hers the finished result!