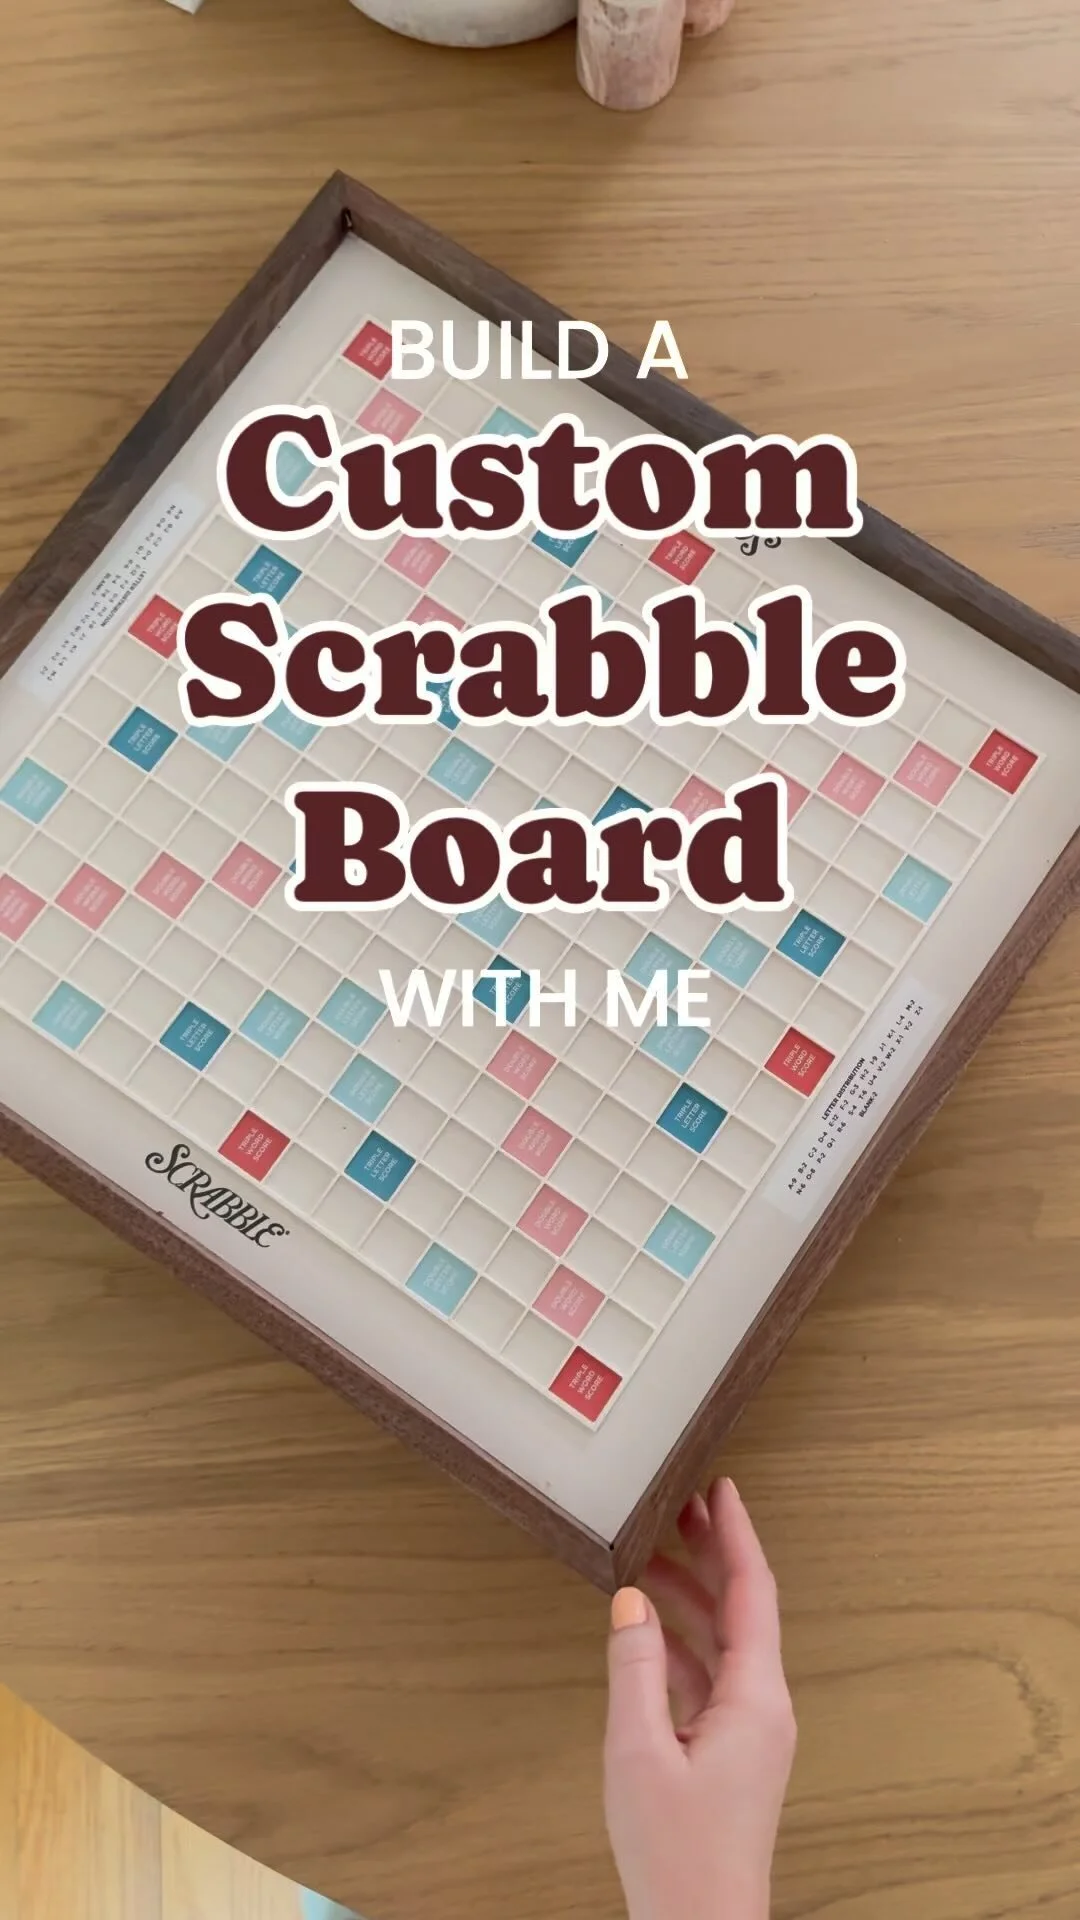
Make a Luxury Custom Scrabble Board
/
One might say why are you making a custom scrabble board!? Also why not!? I lovedd the fancy scrabble boards at Anthropologie and Pottery Barn, but being how expensive they were I figured why not make one myself?? It can’t be that hard! Turns out it wasn’t! Figuring out all the sizing was hard, but after the actual assembly turned out to be pretty fast. I’m going to outline how I made my custom scrabble board, and also provide you with a FREE Scrabble board print and the 3D file for the grid, so you can make your own! Please tag me on socials (@themodernrenovator) if you end up making one!
Supplies
½x2.5x15in (approximately) Walnut (I got a local hardwood shop to plane down walnut to ½)
1x8x8in Walnut (this will be the base)
15x15.5in 1/2 2X4 MDF
3D Grid (I printed this at Xometry, but attaching STL file if you have a big enough 3D printer!)
Spray Paint (I got Krylon Satin Bright White)
Scrabble Print (print at your local UPS or print shop for a high quality vinyl print)
Total Cost: $100-150 depending on wood you buy

Step 1 - Print Scrabble Board
First start by getting the scrabble board printed! You’ll find the PDF file linked in the supplies! I printed mine at a local print shop, but UPS can also usually print high quality stuff. Make sure you request they print on a matte or satin vinyl, this way it will be slightly more waterproof if it did get a spill on it. It should be like a giant sticker that you can peel off

Mark the center of your base with an x. PLace lazy susan on top and mark where the holes are. You also will mark a hole with the perpeNDICUlar side and drill a large hole that can fit your drill.
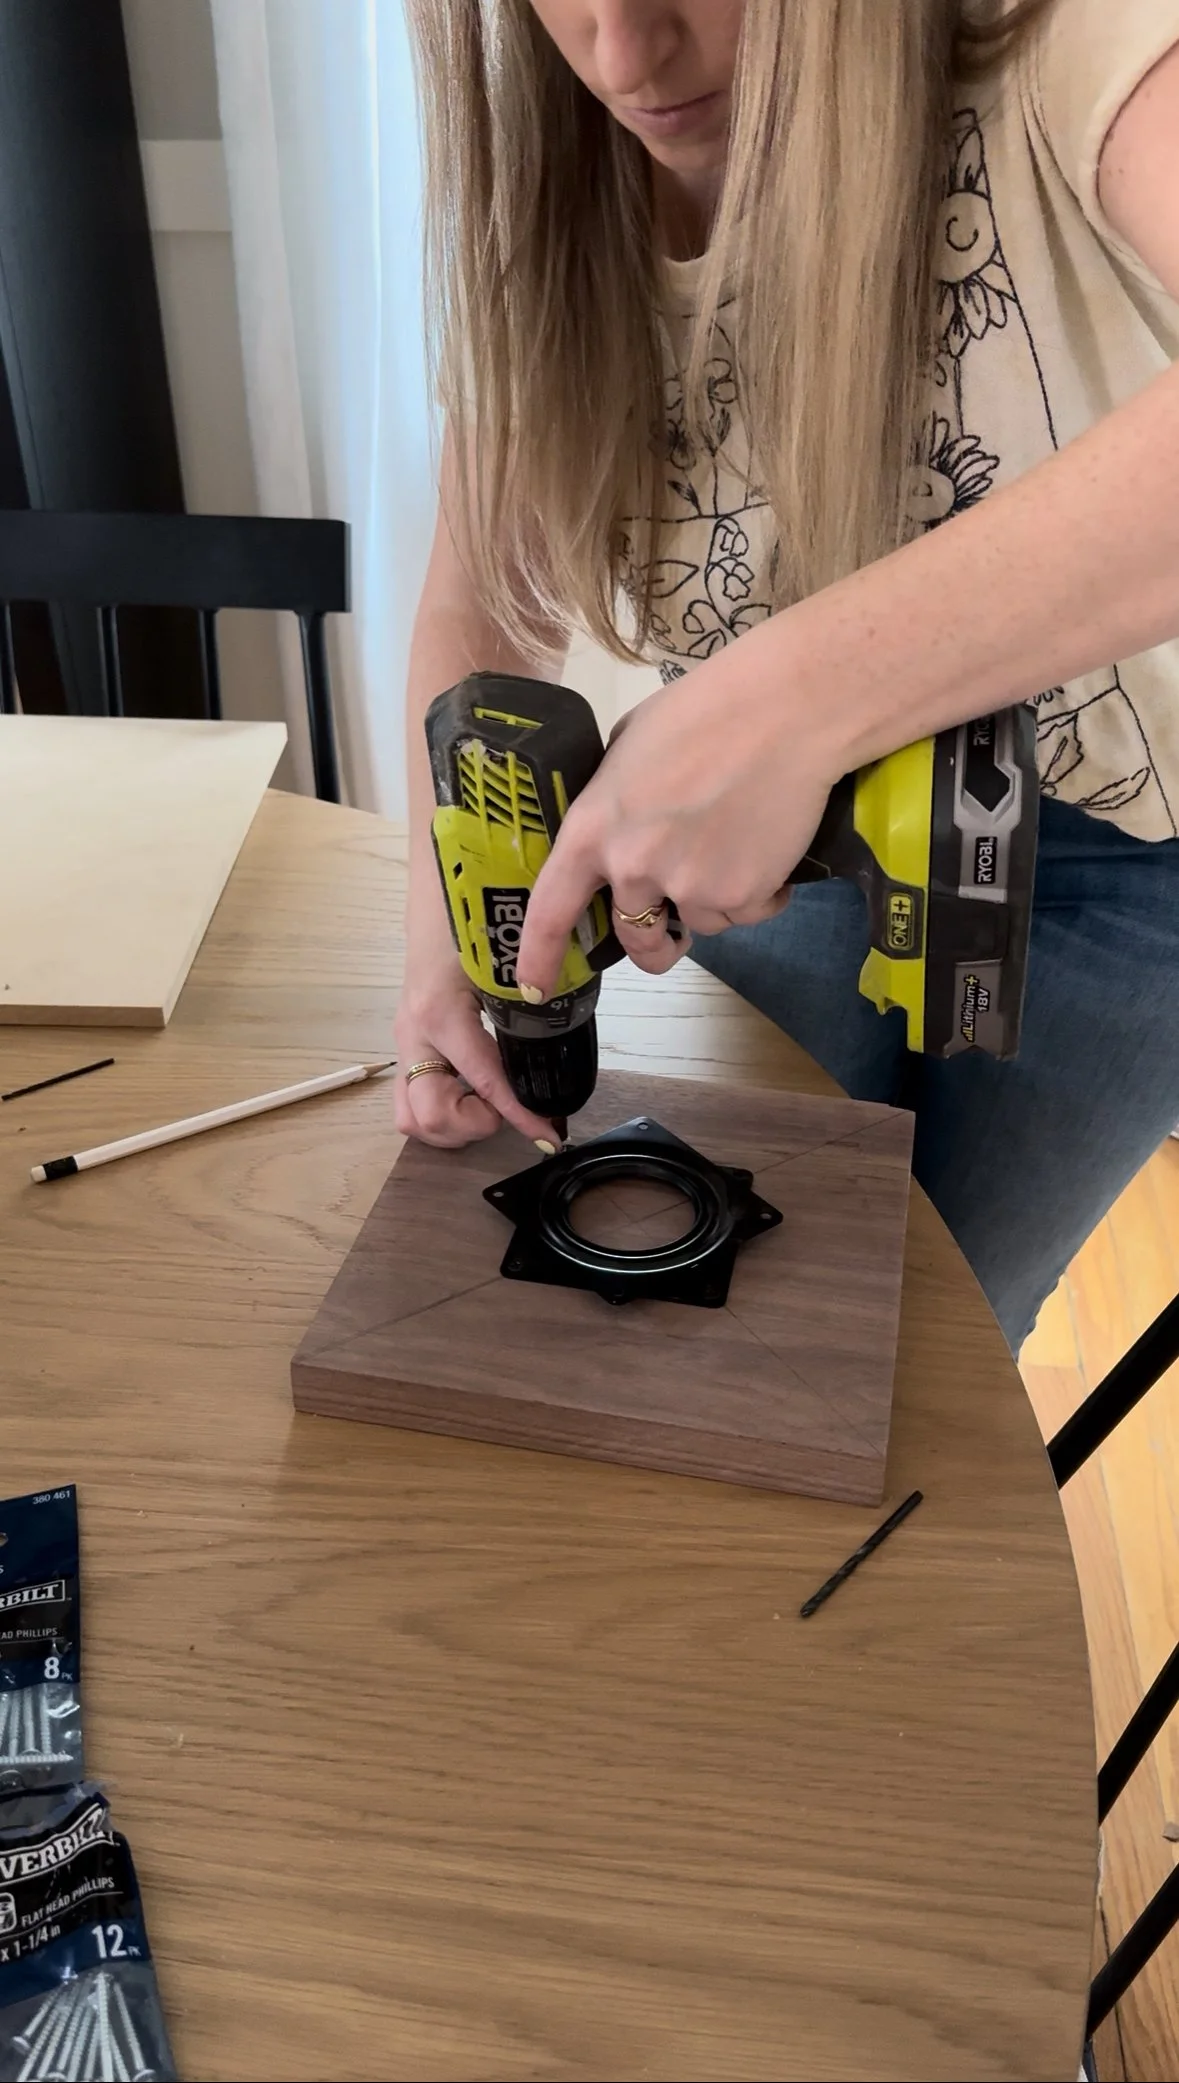
screw the lazy susan on to the base.

mark a large x on the MDF board and line up your x’s so that the base is centered. You’ll then swivel the walnut base until you see the screw holes for the lazy susan and screw it into the MDF.
Step 2 -Assemble and Install Lazy Susan
Cut the MDF and base walnut to size. Once your pieces are cut you’ll want to install the lazy susan hardware. I was so confused at first how you even do this, but this Youtube video does a great job of explaining how to install it! You’ll essentially drill a large hole in the base wood, so you can see where to screw in the lazy susan into the MDF. You do not have to route out the wood like in that video, so skip that step.
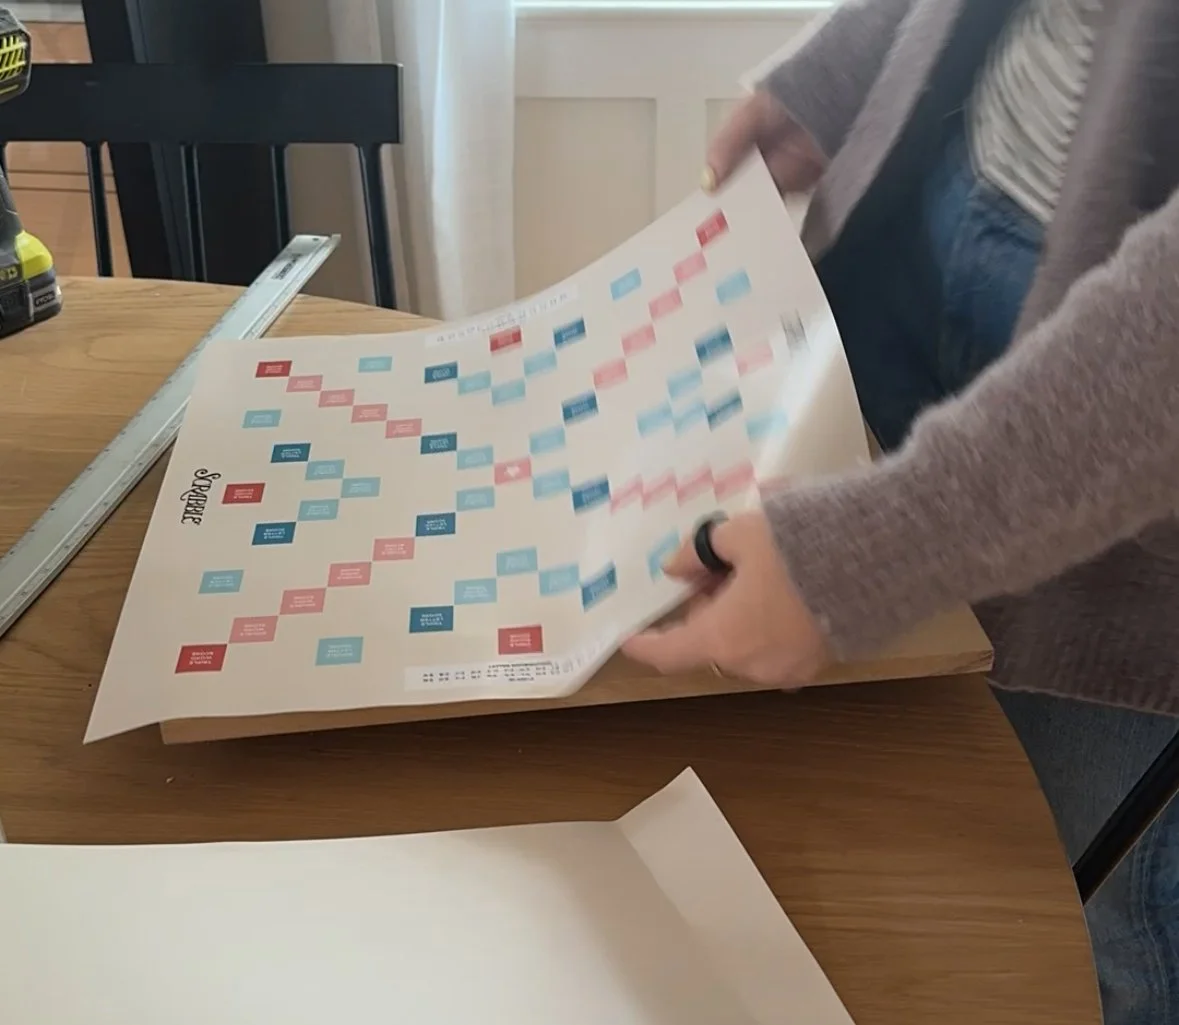
carefully lay vinyl onto particle board. Do not peel the whole backing off at once do a little at a time.
Step 3 - Attach Scrabble Print and 3D grid
Once you have the MDF and base attached to the lazy susan, you can go ahead and add the scrabble print. Vinyl usually already has a sticker backing, so it’s essentially a large sticker you can attach to the MDF. Be careful to put this on depending on how sticky the vinyl is you get. I recommend keeping the backing on and peeling back a small amount at a time while you stick it on. Once you’ve got that on, attach the 3D grid. My grid needed spray painting, so I spray painted first, then glued it down using a paper safe clear glue. Some 3D prints you can get in white or black already and may be able to skip spray painting!
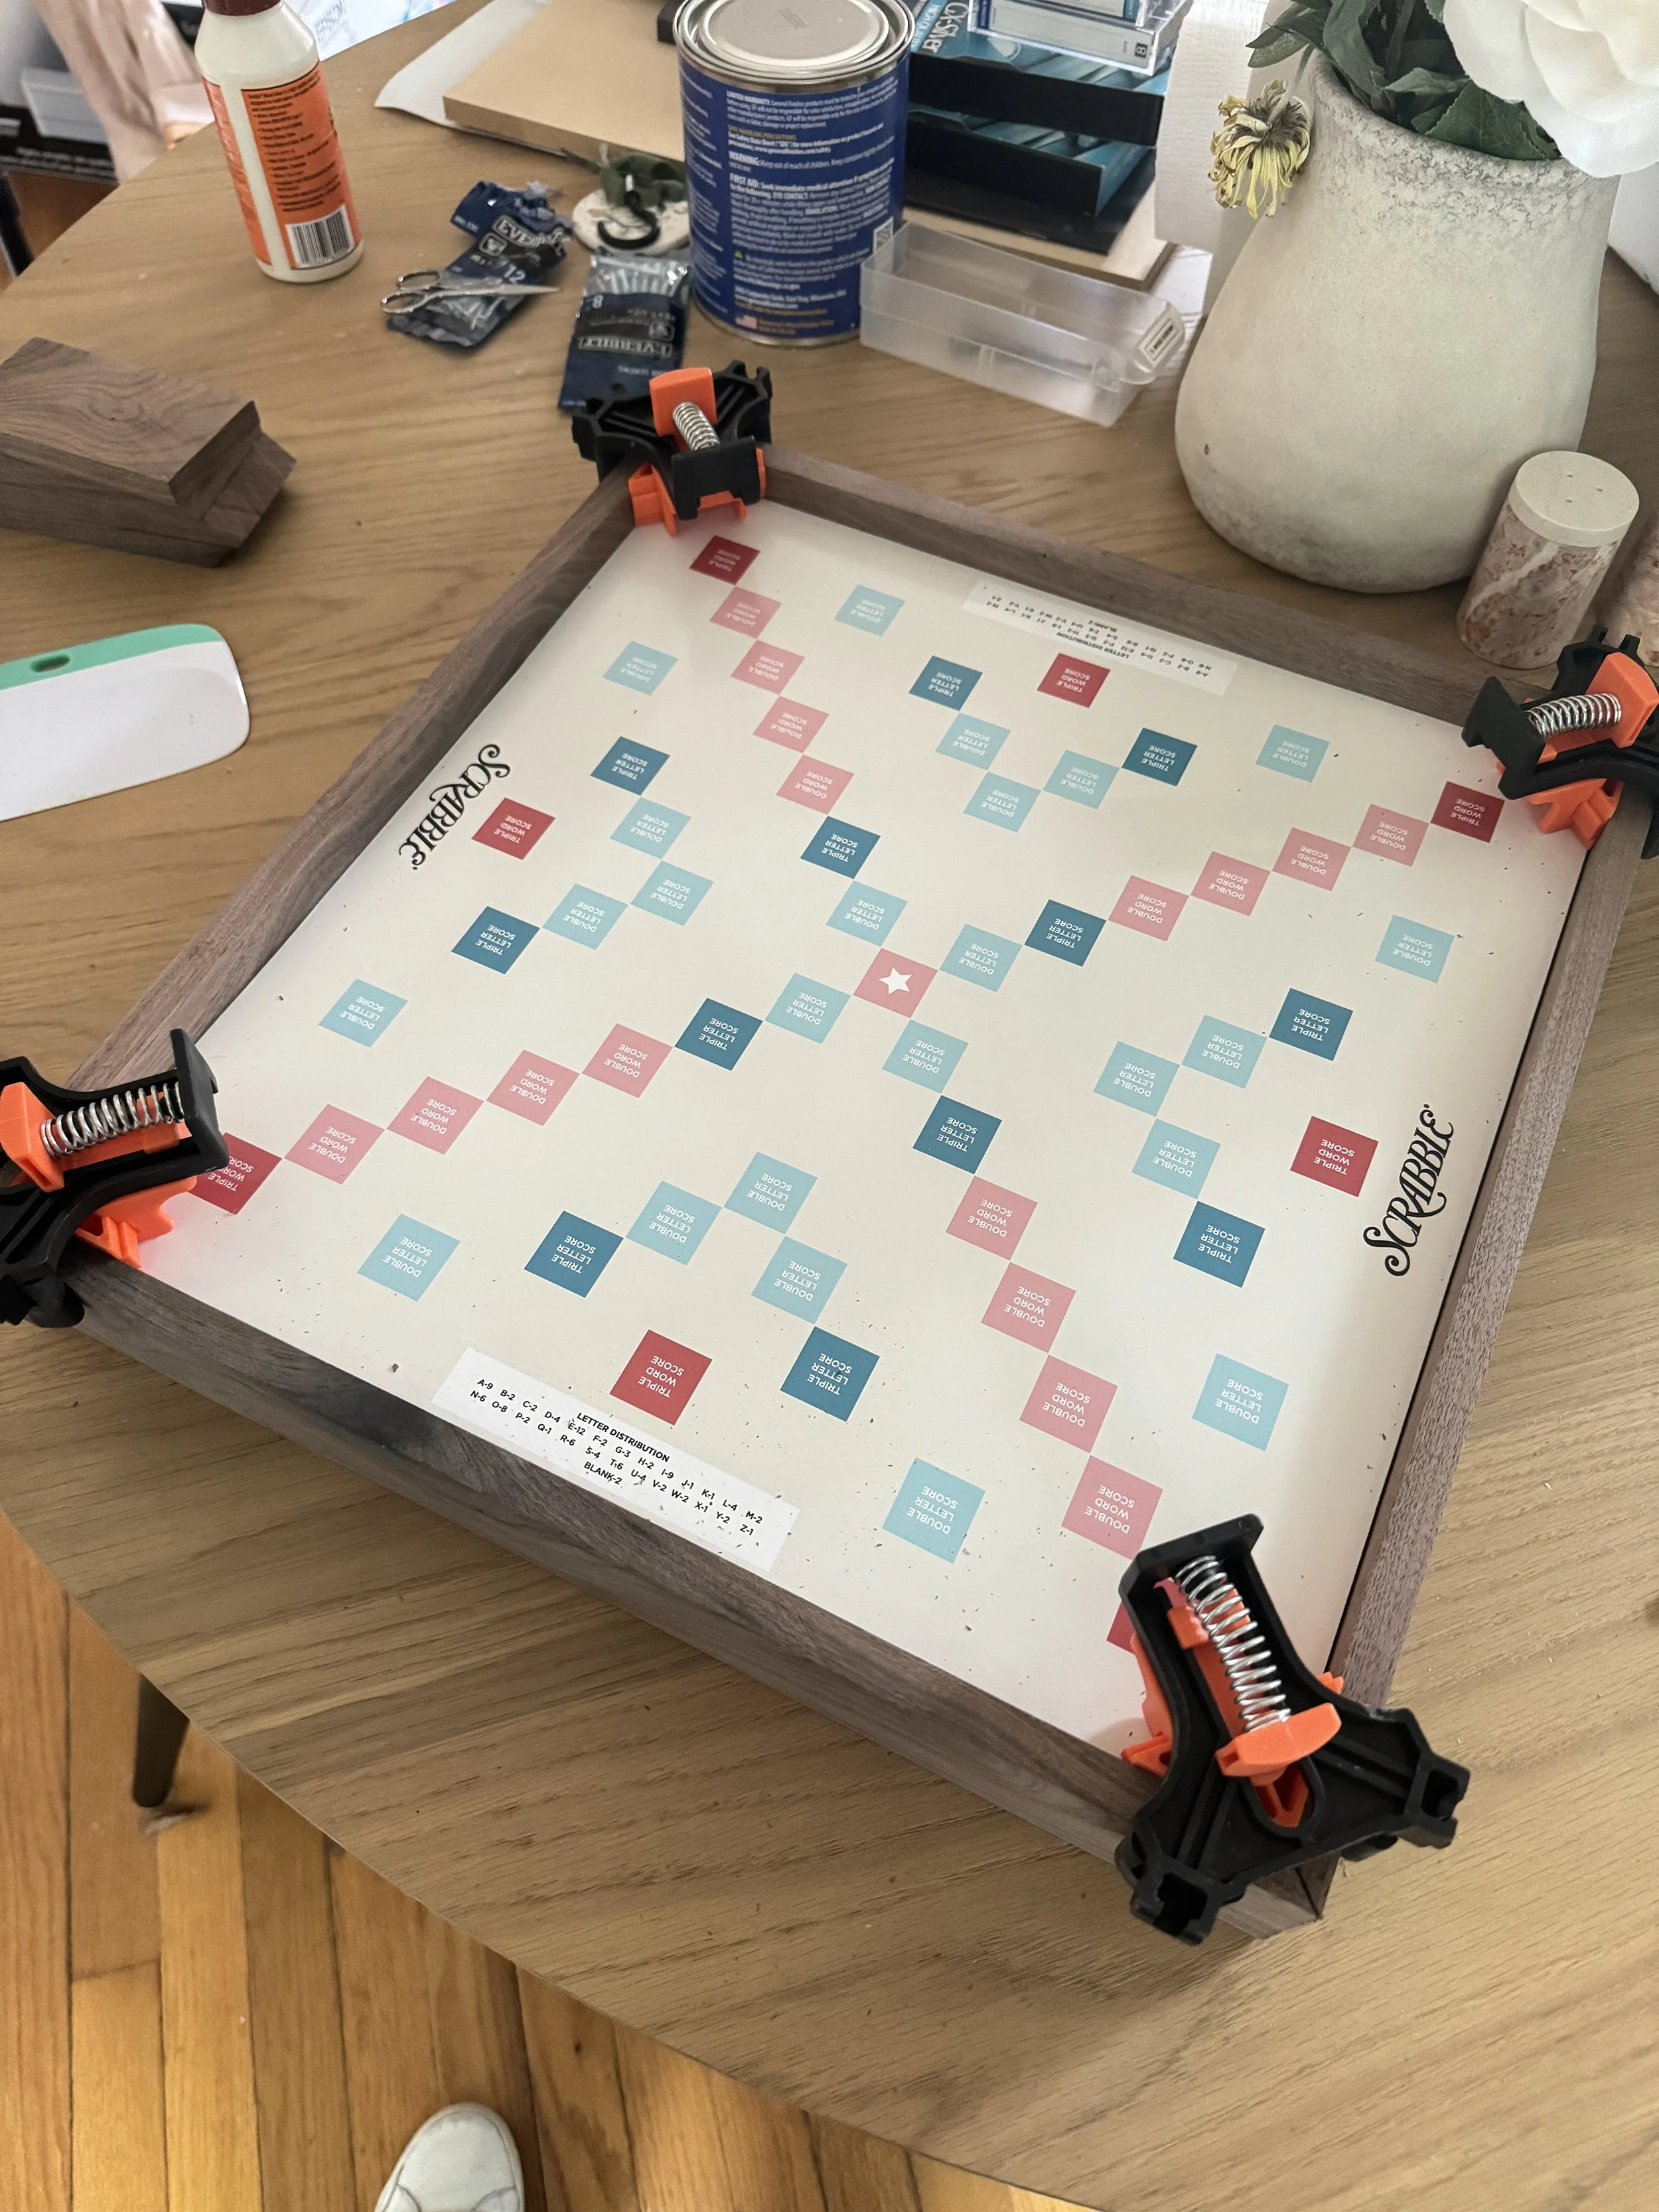
Glue side wood pieces to the mdf and use clamps to hold it on. Make sure to leave a little room on the bottom so that the sides are floating and it can spin.
Step 4 - Cut Side Pieces to Size
I wanted my scrabble board to feel really nice, so I opted for nicer wood (Walnut specifically), but you can use any wood, I just recommend planing it down to ½ so it’s not too thick. My local hardwood store planed the wood for me. Cut the wood into 2.5in strips and then miter and cut the wood to the size of each side of the board. I always measure then cut the wood based on the exact measurements of the board since it needs to be so precise. It may be more 15.15in for example. Once you have all your side pieces, just use wood glue to glue them up the the MDF. I made it so that my side pieces float just barely off the ground, so the lazy susan spins smoothly. I used some corner clamps to hold everything together.

variations! Dark walnut with white gride vs. white oak with black grid
Step 5 - Finishings
If you’re mitered corners don’t look perfect the best hack is to save any of the saw dust from cutting down your wood and mix it with a little bit of glue to fill into the cracks. Then quickly use an electric sander to help blend it all together. It works perfectly to hide seams in wood! Then I went over all the wood 2 coats of polycrylic sealer.
You can also stain the scrabble trays to match your board! I got some Dark Walnut stain to help match them to my board.
You’re Done!
Enjoy your beautiful heirloom scrabble board that you’ll want to leave out on the table!