How to Install Thin Brick Pavers to your Porch
/This was a fun one! I’ve been wanting to add thin brick pavers to my porch for a while. There were bricks on the border of it at one point and they got painted over. I could strip the paint off, but I knew I wanted a certain look with the pavers, so I decided to go the thin brick route. Also weirdly enough the concrete pad in the middle of my porch was raised a little higher, so when I went to add the thin bricks they lined up perfectly. I know this isn’t everyone’s situation, but this tutorial will also work for people who want to do their whole porch!
Because I only had a small porch, and only doing the border I opted to go the glue route. They make this landscaping brick liquid nail essentially you can just use with your caulk gun, and to me it was a lot less messy. They’re still holding on a year later as well, so the stuff seems pretty strong!
Supplies
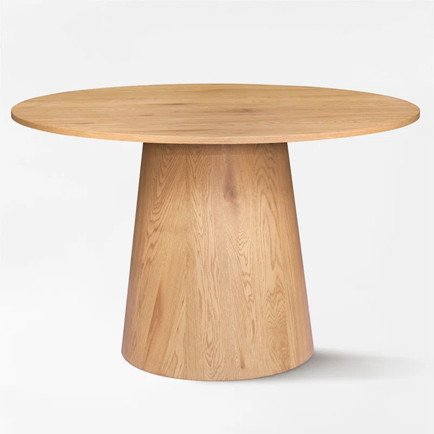
Old Mill Thin Brick Pavers in Castle Gate (I got 2 boxes of singles and 4 boxes of corner pavers) - $450
Grout in Avalanche (took 2 bags) - $40
Grout bag - $7
Locite Landscape Brick Adhesive (I think it took 4 of these) - $30
Tile Adhesive (better thing to use) - $45
Tile Cutter (worked great to cut single pavers!) -$30
Total Cost: $600

lay out bricks in a dry run to get an idea of spacing and design
Measure your space
Most important thing to do is first measure your porch and figure out how many pavers you’ll need. You can see how much come in a box and measure accordingly. Always account for a little overage for the bricks you’ll have to cut in half as well. I first started by laying out all the bricks in a dry run to make sure they would all fit accordingly. For me I could see the old bricks under the paint, so I used that as a measurement for spacing, but otherwise, just eyeball the spacing. You want it to be thicker than you would do for tile.


Cut & Glue Thin Bricks
Now i’m not going to pretend this is the best method, but it’s the one I chose because it was a small job, and I thought brick adhesive was just too much of a mess. I used my caulk gun to apply the landscape glue adhesive and stuck on my border, followed by the bricks on the side. The side bricks didn’t love this glue they kept sliding down, so I had to hold them on there until the glue started to dry or propped them up. But if you’re not putting any bricks on the side this isn’t a problem. I’ve provided the alternative adhesive you can use if you’d rather go the more traditional route.

AN EXAMPLE OF HOW MUCH GROUT I ADDED before wiping smooth

what your grout should look like once you wipe with a sponge
Grout the Bricks
This is the part that gets messy. I’m not sure there’s really any right way to do it. But I used the powder grout where you have to add water to it. You want to make sure you don’t make your grout too runny or it will be really hard to apply the grout. It should look like brownie batter. The good thing about this part is it doesn’t have to be perfect, especially if you’re going for an over-grouted look.
Using the grout bag I linked in supplies, fill it up with grout once you’ve mixed it to the right consistency and just pipe on between all the brick spaces! The trick to this part I think is letting it dry just slightly before wiping the top. You want it dry enough that the sponge won’t soak it all up, but still wet enough to manipulate. I used a big wet sponge to smear the grout flat and really level it to the bricks. They make tools for this, but I tried it and it didn’t work well for me, so just use a sponge or your fingers, whatever works for you! I don’t think there’s really any right way to do this just keep adding grout and smoothing it out until you get the look you want!
Before the grout has dried completely make sure to take a clean sponge and clean off all the grout smog that’s on your pavers. This will help bring out the color of the bricks again especially if you used a light color grout like me!

BEFORE WIPING DOWN

AFTER WIPING DOWN
You’re Done!
And that’s it! It’s really not too hard, and pretty similar to tiling if you’ve ever done that, only you don’t have to be as precise! Now revel in your new custom brick paver porch!

BEFORE

AFTER